May is one of those months that feels like a fresh breath of air—flowers are in full bloom, gardens start to thrive, and there’s excitement in celebrating special occasions like Mother’s Day and Memorial Day. When I first introduced May crafts to a senior group, the joy was undeniable. Between the cheerful colors and outdoor-inspired projects, everyone found a craft that made them smile. Whether it’s creating something for a loved one, sprucing up a living space, or simply enjoying the process, these craft ideas are perfect for bringing joy to senior adults this May.
Floral Picture Frames
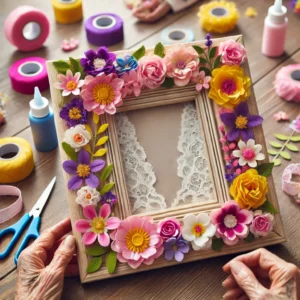
Decorating picture frames with flowers adds a touch of spring to any room and provides seniors with a way to preserve memories creatively. Faux or dried flowers work well for this craft, ensuring that the frames stay beautiful all year round.
Materials Needed:
- Wooden or cardboard picture frames
- Faux flowers, dried flowers, or pressed flowers
- Hot glue gun and glue sticks
- Optional: Ribbon, twine, or small decorative charms
Steps:
- Choose your flowers: Select a mix of small and large flowers in vibrant spring colors like yellow, pink, and purple.
- Arrange the flowers: Before gluing, lay out the flowers around the frame to see how they’ll look.
- Attach the flowers: Use the hot glue gun to attach the flowers, working in small sections to avoid gaps.
- Add finishing touches: Tie a small ribbon bow or glue a charm onto the frame for extra flair.
- Display your photo: Place a favorite family photo or a scenic picture inside the frame.
This craft is simple, beautiful, and brings a warm, personal touch to any space.
DIY Herb Planters
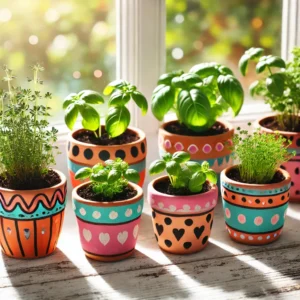
One of the best ways to celebrate spring is by growing something, and herb planters are a great start. Seniors love this activity because it not only allows for creativity in decorating the pots but also gives them a rewarding project they can tend to daily. Fresh herbs can later be used in cooking, making the craft even more meaningful.
Materials Needed:
- Small pots (terracotta or ceramic)
- Acrylic paint and brushes
- Soil
- Herb seeds (basil, thyme, chives, or parsley)
- Optional: Stencils for decorating
Steps:
- Paint the pots: Use acrylic paint to decorate the pots with bright, cheerful patterns—stripes, polka dots, or floral designs work well.
- Plant the seeds: Fill each pot with soil and plant the herb seeds according to the instructions on the seed packet.
- Water and place in sunlight: Keep the pots in a sunny spot and water them regularly.
- Label the pots: For an added touch, write the name of each herb on a small craft stick and place it in the pot.
This craft combines creativity and nature, giving seniors a sense of purpose as they watch their herbs grow.
Painted Terracotta Pots
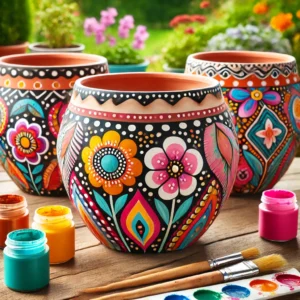
If herbs aren’t your thing, decorating terracotta pots is still a fun and relaxing craft. Seniors can use these painted pots for other plants or even as decorative holders around the home.
Materials Needed:
- Terracotta pots (small or medium-sized)
- Acrylic paint (in various colors)
- Paintbrushes (small, medium, and large)
- Painter’s tape (optional, for clean lines)
- Palette or disposable plate (for mixing colors)
- Sealer or clear varnish (optional, for outdoor use)
- Water cup (for cleaning brushes)
- Paper towels
Steps to Paint Terracotta Pots:
- Clean the pots:
Before starting, ensure the terracotta pots are clean and dry. Wipe off any dust or dirt with a damp cloth and let them air dry completely. - Base coat (optional):
If you want a uniform background color, apply a base coat of paint using a large brush. White, pastel, or bright colors work well for a spring theme. Let the base coat dry completely before adding designs. - Create designs:
Use smaller brushes to paint designs on the pot. Seniors can create patterns like:- Flowers: Paint simple daisies or tulips for a springtime look.
- Polka dots: Use the back of the brush or a sponge for neat, round dots.
- Stripes: Apply painter’s tape to mark out straight lines before painting stripes.
- Abstract patterns: Let creativity flow by mixing colors and adding swirls or geometric shapes.
- Personalize:
For an extra touch, seniors can write their names or short messages on the pots using a thin brush. Metallic paints like gold or silver can add a special flair. - Let the pots dry:
Once all designs are complete, let the pots dry for at least 1-2 hours to ensure the paint sets. - Seal the paint (optional):
If the pots will be placed outdoors, apply a coat of clear sealer or varnish to protect the paint from weathering. Make sure the sealer is labeled for outdoor use. - Plant your greenery:
Fill the decorated pots with soil and plant flowers, succulents, or herbs. Place them on a sunny windowsill or outdoor patio for display.
Tips for Success:
- Use vibrant, contrasting colors to make the designs pop.
- Encourage seniors to use simple stencils if they’re unsure about freehand designs.
- For a group activity, set up a pot-painting station with shared paint palettes and brushes.
Mother’s Day Greeting Cards

Mother’s Day is a special time to show appreciation, and nothing is more heartfelt than a handmade card. Seniors can create cards using various materials and techniques, from simple watercolor designs to layered paper cutouts.
Materials Needed:
- Blank cards or cardstock paper
- Colored paper, markers, and stamps
- Glue, scissors, and decorative stickers
Steps:
- Design the front: Use colored paper or markers to create a floral or heart-themed design.
- Add a personal message: Inside the card, seniors can write a thoughtful note or poem.
- Decorate the envelope: Add a sticker or small drawing to the envelope to complete the look.
This craft is especially meaningful when given to a loved one on Mother’s Day.
Pressed Flower Bookmarks
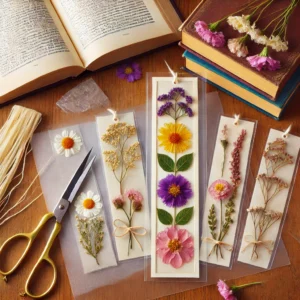
For seniors who love reading, pressed flower bookmarks are a simple yet beautiful craft that combines nature with practicality.
Materials Needed:
- Fresh flowers (small and flat ones work best)
- Wax paper
- Heavy books
- Clear contact paper or laminating sheets
Steps:
- Press the flowers: Place the flowers between sheets of wax paper and press them under a heavy book for a few days until they’re fully flattened.
- Create the bookmark: Cut a piece of cardstock to the desired size and arrange the pressed flowers on it.
- Laminate the bookmark: Cover the bookmark with clear contact paper or use a laminating machine to protect it.
- Punch a hole and add a tassel: For a finishing touch, punch a hole at the top of the bookmark and tie a decorative tassel through it.
This craft results in a lovely keepsake that seniors can use or gift to friends.
Patriotic Wreaths for Memorial Day
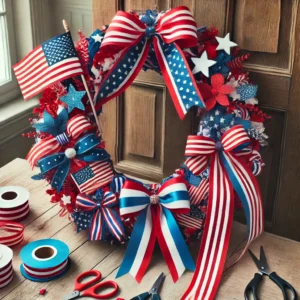
With Memorial Day falling at the end of May, creating patriotic wreaths is a great way for seniors to honor the holiday. These wreaths can be displayed on doors or windows to show respect and remembrance.
Materials Needed:
- Foam or wire wreath frame
- Red, white, and blue fabric or ribbon
- Small American flags
- Hot glue gun
Steps:
- Wrap the wreath frame: Use strips of fabric or ribbon in red, white, and blue to wrap around the entire frame.
- Add decorations: Attach small flags and bows using the hot glue gun.
- Create a hanger: Tie a loop of ribbon at the top for hanging.
This craft is simple but meaningful, making it a perfect way to mark the occasion.
Birdhouse Decorating
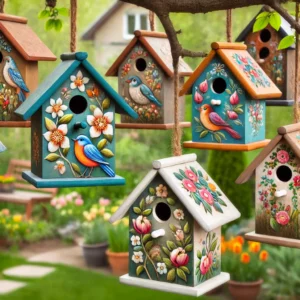
Birdhouses are a fun and interactive craft that lets seniors get involved with nature. Once decorated, these birdhouses can be placed in gardens to attract birds, providing ongoing joy.
Materials Needed:
- Unfinished wooden birdhouses (available at craft stores)
- Acrylic paint in various colors
- Paintbrushes (small and medium sizes)
- Stickers, buttons, or small wooden cutouts for decoration
- Hot glue gun and glue sticks
- Clear varnish or outdoor sealant (optional for weatherproofing)
Steps to Decorate Birdhouses:
- Prepare the birdhouse: Ensure the wooden surface is clean and smooth.
- Paint the base color: Use acrylic paint to cover the entire birdhouse in a base color. Let it dry completely.
- Add designs: Once the base coat is dry, use smaller brushes to paint patterns, flowers, or any design that fits a spring theme.
- Attach decorations: Use a hot glue gun to attach stickers, buttons, or small wooden shapes for extra detail.
- Seal (optional): If the birdhouse will be placed outdoors, apply a coat of clear varnish or sealant to protect it from the elements.
- Display: Seniors can place the birdhouses in a garden or hang them from trees to attract birds.
Beaded Sun Catchers

Beaded sun catchers are another craft perfect for spring. When hung in a window, they catch the sunlight beautifully, adding color and sparkle to a room.
Materials Needed:
- Clear fishing line or thin wire
- Colorful glass beads or plastic beads
- Scissors
- Wire or bead loop frame (available at craft stores)
- Small suction cups with hooks (for window display)
Steps to Make Beaded Sun Catchers:
- Cut the fishing line: Cut several pieces of fishing line or wire, each about 12 inches long.
- Thread the beads: String the beads onto each piece of line, creating patterns with different colors. Leave some space at the top for tying.
- Tie to the frame: Once the lines are beaded, tie them securely to the loop frame.
- Attach the suction cup: If using a suction cup, tie the top of the frame to the hook on the suction cup.
- Display: Place the sun catcher on a sunny window, where it will create beautiful, colorful reflections when the sunlight hits the beads.
Spring-Themed Door Hangers
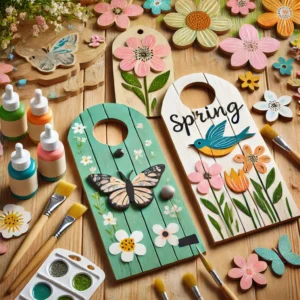
Door hangers are a fun way to decorate and can be personalized with spring themes like flowers, butterflies, or birds.
Materials Needed:
- Wooden or cardboard door hanger bases
- Acrylic paint in spring colors (pastel shades work well)
- Paintbrushes
- Foam or felt cutouts (flowers, butterflies, birds)
- Stickers, glitter, and ribbons
- Hot glue gun
Steps to Make Spring Door Hangers:
- Paint the base: Start by painting the door hanger base in a bright spring color. Let it dry completely.
- Add decorative elements: Use foam or felt cutouts, stickers, or even glitter to create a spring scene. Seniors can glue on butterflies, flowers, or birds.
- Attach a ribbon: Tie a decorative ribbon at the top for hanging.
- Personalize: Seniors can write their names or a welcoming message like “Hello Spring!” on the door hanger using paint or markers.
- Display: Hang the finished piece on a front door or bedroom door to welcome spring visitors.
Paper Butterfly Garland
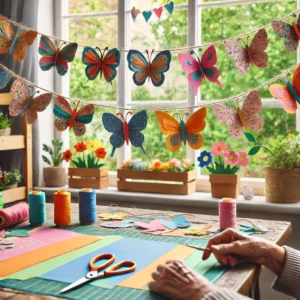
A paper butterfly garland is a simple, cheerful craft that can be used to decorate windows, walls, or mantels. Seniors can cut out butterflies from colorful paper and string them together for a whimsical spring decoration.
Materials Needed:
- Colored paper (in various bright or pastel shades)
- Butterfly-shaped stencils
- Scissors
- Hole punch
- String or twine
- Glue or tape
Steps to Make a Paper Butterfly Garland:
- Create the butterflies: Use the stencil to trace butterfly shapes onto the colored paper, then cut them out. Seniors can choose multiple colors for a vibrant effect.
- Punch holes: Use the hole punch to make small holes near the top of each butterfly.
- Thread the string: Thread the string or twine through the holes, spacing the butterflies evenly along the length of the garland.
- Secure with glue or tape: To keep the butterflies in place, apply a small dot of glue or tape at the back of each butterfly where it meets the string.
- Hang the garland: Display the garland along windows, walls, or doorways for a festive spring decoration.
Final Thoughts
May crafts for seniors are a delightful way to celebrate the beauty of spring, honor special occasions, and spend quality time being creative. From floral picture frames and herb planters to patriotic wreaths and pressed flower bookmarks, there’s something for everyone. These crafts not only provide a fun pastime but also promote mental well-being, fine motor skills, and social interaction.
Encourage seniors to get hands-on with these ideas, and they’ll find joy not just in the finished products, but in the process of creating them. Ready to get started? Gather the supplies, enjoy the creativity, and watch the smiles bloom just like the flowers in May!
Leave a Reply